How To Propose School Library Lessons to Teachers

How To Propose School Library Lessons to Teachers - School Librarians can create great Library Lessons, but unless teachers bring students to the library, those lessons just stagnate in our file drawers. Here's how to convince a teacher that a meaningful library visit will enhance classroom instruction. #NoSweatLibrarySchool Librarians come up with lots of new ideas for school library activities—or we get them from other librarians—and many seem fun and educational for students. If the library is part of student scheduling, we can present a variety of these lessons at regular intervals, but for most of us, the biggest obstacle to implementing our ideas is how to get teachers to accept a lesson and bring classes to the library.

We can’t expect teachers to waste their constrained class time on something that is “just fun.” We must convince them a library lesson visit is relevant to what students are studying in the classroom. So, whenever I find or imagine a great lesson idea, I ask myself 3 questions:

  1. What subject curriculum standard does this best support?
  2. How do I make the lesson irresistible to teachers and students?
  3. Who are my most accommodating teachers in this subject?

SUPPORT SUBJECT OR CURRICULUM STANDARDS

If we expect teachers to bring students to the library, we must offer something that will enhance classroom activity, not take time away from it. Even if a lesson serves a good library purpose, it’s only useful if we can tie it to a subject standard. This is where knowledge of subject curriculum is essential, and to help me choose the best subject to support, I use my Library Lesson Curriculum Matrix which documents topics being studied in subject-area classrooms during the school year.

Once I decide which subject is best suited for the lesson idea, I then fill in my Library Lesson Planner with the subject’s Standards. If you’ve not already downloaded PDFs of national standards for various curricula, here are links to some of them:

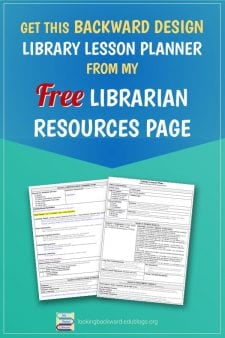
Show Teachers Quality Library Lessons: Use My Backward Design Planner - School Librarians will get positive responses from teachers when proposing Library Lessons using this Library Lesson Planner. The backward design model starts with Subject Standards & National School Library Standards to create a high-quality and meaningful lesson for students that enhances classroom learning. #NoSweatLibraryThe next step is to fill in the Library Lesson Planner with subject-area Understandings, Key Questions, and Objectives so the teacher sees at a glance how the lesson aligns to their curriculum. We can usually find those from scope & sequence documents or teacher lesson plans. These additional entries go a long way toward convincing a teacher that we’ve planned a lesson to enhance their classroom activities and engage students in worthwhile learning.

Next, add the National School Library Standards, Understandings, Key Questions, Objectives, and so on. I use the same guidelines to create every Library Lesson:

  1. Focus on a single objective.
  2. Teach only what students need for the time they are in front of me.
  3. Give students an activity that allows them to practice what they’ve learned.
  4. Avoid anything that does not achieve the purpose of the visit.

My teachers appreciate having a role in the lesson presentation, so I try to incorporate that into my Instruction Plan. When students see us teaching together, they learn that the school librarian is respected by their teacher as a partner.

MAKE THE LESSON IRRESISTIBLE TO TEACHERS & STUDENTS

I read a lot of activity ideas on listservs and blogs, I hear about them at meetings, trainings, and conferences; what grabs my attention are hands-on sorting or game-type activities, unique handicraft products, or lessons that have students using technology. These activities also appeal to teachers and they’ll get students excited and engaged.
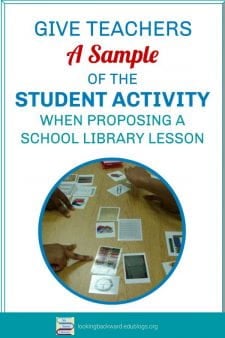
Make Your School Library Lesson Irresistible to Teachers with an Activity Sample! - Inspire a teacher to accept a School Library Lesson by creating a sample of your hands-on activity. When they see that students will do something to enhance their classroom learning, they're more likely to want a library visit. #NoSweatLibraryTo inspire the teacher, I create a sample of the game or handicraft, or print screen-shots of the technology so they can see what students will be doing. This extra step is the clincher for the teacher accepting the lesson…and often the stimulus for others to want a library lesson when the teacher shows the sample around! (I can use the sample during the lesson to model with students…that is, if I can get it back!)

Hands-on activities are a necessary alternative to technology in schools with a large digital divide. I’ve written about my favorite foldables—the biocube, the basketweave for summarizing, and the versatile accordion book. I use a concept attainment sorting activity for my 6g Library Orientation and I also use a sorting activity for a 6g lesson on organization tools.

APPROACH THE MOST ACCOMMODATING SUBJECT TEACHERS

Once we create our Library Lesson Plan, we can seek out a “friendly” teacher in that subject and give them a printout of our Plan along with the sample activity. Even as a new librarian to our school, we already have teachers who are strong library supporters. If we’re really fortunate, we’ll have a few subject “buddies” who are always willing to try any idea for a library visit.

Just as we need time to ponder a teachers’ ideas for us, the teacher needs time to consider ours, and giving them the Lesson Plan lets them do that. Supportive teachers will give an honest response on the efficacy of our idea and, if yes, convince their teaching partners to try it. They can also help us refine our lesson presentation to be even better and more relevant.

HOW TO MAKE IT WORK

Once we convince a teacher to let us do our lesson, we want to implement the best delivery. If we give a slide presentation, make it illustrative and minimize text. Use the Notes feature to create the dialogue/script and print that out as a prompt during the presentation.  And keep it short–fewer than a dozen slides–so students have plenty of time for the activity. (See Modeling Digital Literacy for a full explanation and a handout.)

We want to minimize downtime, so have activity items or craft supplies already on tables and have computers ready for login. Borrow extra wastebaskets and put next to tables to minimize student “travels”. (My custodian always has a half dozen or so extra wastebaskets for teachers to borrow.)

Finally, after the lesson, ask the teacher for input on ways to improve. When we do that, teachers will want to bring students year after year for our lessons, and will come to us to ask when they can schedule library visits into their lesson plans!

line of books laying down - indicates end of blog article

Join my mailing list to get a brief email about new posts on library lessons & management. You'll also gain access to my exclusive e-Group Library of FREE downloadable resources!

12 Great Tips to Help Students, Teachers, & the School Librarian

12 Great Tips to Help Students, Teachers, & the School Librarian - Here are 12 tips and tricks that can help you manage the school library and promote it—and the School Librarian—to students and teachers. Remember, the most positive Library Promotion we can do is through our actions rather than our words! #NoSweatLibraryDuring my dozen plus years as a School Librarian I’ve picked up several ideas from colleagues, from my listservs, and from racking my brain to find solutions to a problem.

Not only have those pointers helped with managing the library, they’re also good library—and librarian—advocacy. Whenever we do something memorable for students or for teachers, it builds rapport and promotes our school library services. It’s good to remember that the most positive Library Promotion we can do is through our actions rather than our words!

Now, let me share with you 12 of the best of these tips and tricks.

FOR STUDENTS:

  1. For School Library Media Month, create a patron called “Winner! Winner!” and check out a few dozen books to that patron. Re-shelve the books (still checked out). When a student checks out one of the books, a pop-up message tells you “This item is checked out to Winner! Winner!” The student ‘winner’ gets a little prize like a bookmark, poster, or acceptable snack item.
    (Idea from Michelle Burger LMS, Beach Elementary School, Portland, OR)
    linebreak
  2. I use a laser pointer to direct students a location they’re having trouble finding. By pointing to the aisle and the sign on the end of a bookcase, I can quickly guide them when I’m busy with others at the circulation desk or in a different area of the library.
    linebreakA Tip to Help Students: Create Series Signs of Book Covers - Students like to read a book series in order, so help them out by making signs with the book covers in order and attaching them to the pertinent shelves. #NoSweatLibrary
  3. Help students track series books with signs showing the covers of the books in order. I make our signs with a simple slide presentation app. When printing, use options for multiple slides per page, then laminate and tape the signs to the inside backs or uprights of shelves.
    linebreak
  4. Purposeful decorative signage – Even a “fun” poster, can serve a purpose when placed where it relates to content. Here’s what I do:
    • DK Eyewitness books come with posters, so I write the relevant Dewey numbers on the posters and put them on the ends of related bookcases or on the wall at the end of the aisle. The colorful posters invite students to find those books on the shelves and serve as location reminders.
    • At the end of our 973 U.S. History and Historical America aisle are posters of the Statue of Liberty and Texas cattle brands. Both posters tell students it’s the location of U.S. and Texas History fiction & Dewey books.
    • On the ends of the Spanish Fiction bookcase is a reading promotion poster written “en Español”—both a locator and language practice.

FOR TEACHERS:

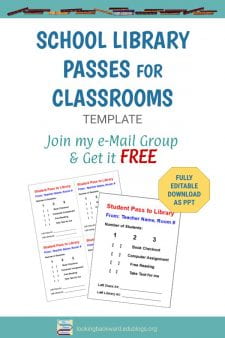
  1. A Tip to Help Teachers: Create Customized Passes to the Library - Create a personalized library pass for every teacher, laminate them, & teachers can use a dry-erase marker to write on them. When students return, the teacher just wipes off the pass. Join my email list & you can download the editable template FREE! #NoSweatLibraryLaminated Library Passes – At the start of each school year I create a Library Pass for each classroom teacher. (4 passes fit on a sheet of letter-size paper.) Since they’re laminated, teachers use a dry-erase marker to write student names and their purpose for being sent to the library. When students return, the teacher just wipes off the pass. Attaching a magnetic or stick-on clip allows the teacher to attach it to the wall near the door. You can get the template by joining my mailing list!
    (I also create 6 numbered & laminated passes for me to send students to their locker for overdue books. All 6 fit on a sheet of letter-size paper.)
    linebreak
  2. Teacher’s CAB: Classroom Accessories Bin
    When I arrived at my school library I found several dozen black plastic magazine bins. Since we have an online magazine database service, I don’t keep print copies so what to do with all these bins?
    linebreak
    I realized they would be a good way to dispense small items that teachers use every year. I labeled a bin for each classroom and distribute them at the start of the school year; teachers turn them in at the end of the year and I place them atop the bookcases for the summer. They’re very popular with teachers, who keep them handy by their desks. The items in the bin are:

    • a teacher dictionary
    • TV remote control
    • my Quik-flip Teacher’s Guide to the Library
    • their laminated Library Pass mentioned above
    • their room’s color-coded plastic hall pass with extra inserts
    • blank USB drive to back up important documents from classroom computer (purchased in bulk by the principal)
    • select teachers get a digital camera to share with other hallway teachers

    When I dispense the CAB, I also include a Classroom Inventory sheet listing the A/V/D equipment in their classroom and any barcoded teaching materials checked out to them for the year.

FOR LIBRARY MANAGEMENT:

  1. To remove permanent marker from whiteboards, shelves, tables, etc., go over it with a dry-erase marker. When dry, just erase with a dry cloth or dry erase spray cleaner and a cloth.
    linebreak
  2. Use yellow highlighter to write “Original” on the master of a print document; it keeps you (and others) from using it and the yellow doesn’t show up when you make new copies.
    linebreak
  3. Keep mouses and headphones from being taken off computers by securing cables with a plastic self-locking tie and attaching to piece of hardware on the back of the CPU case.
    linebreak
  4. To keep track of pieces of A/V/D equipment, take a digital photo of the item with all its accessories. Create a document with the photo and label the accessories. Print & laminate it, then attach to the main piece of equipment so whoever checks it out can see all the parts to be returned.
    linebreak
  5. Classroom Patrons – In my state, education law precludes teachers being financially responsible for items used by students. So, for books or other items that students will use in the classroom, I created a “Classroom Number [X]” user account for each classroom. I check out items to that account to track them and document circulation, then discharge them when returned. If items are missing I do notify the teachers and they usually find them; however, if an item is still missing at the end of the school year, I just charge it to Missing Items.
    linebreak
    I also use Classroom user accounts to check out items that are barcoded but permanently in classrooms, such as projector screens, TVs, whiteboards, and presentation carts. This allows me to keep a permanent inventory of these items in my system without associating them to teachers who may come and go.

  6. I purchased letter-size acrylic self-stick sign holders and put them inside the windows of the library doors. Various printed signs facing outward alert students and teachers to that day’s library activities and, facing inside, I put reminders for students as they walk out the door. I store the signs right in the holders, and since they’re open on 3 sides it’s easy to change signs.
    image of library door signs

I hope your find these tips and tricks helpful in your own School Library. If you’ve discovered other great ideas, please share them with the rest of us in the comments below!

line of books laying down - indicates end of blog article

Join my mailing list to get a brief email about new posts on library lessons & management . You'll also gain access to my exclusive e-List Library of FREE resources!