My first 2 years as a new middle school librarian were fraught with mistakes, and my first 2 library orientations with ELA classes were especially horrible.
Thankfully ELA teachers gave me a third chance. I was able to create a lesson that is enjoyable for students and supportive of classroom activities.
My post on Library Orientations for Location explains some of my orientation decisions, but I offer here more detail on the rationale for what I do…and don’t do!
BEFORE ORIENTATION
Our School Library Orientation establishes our year-long relationship with students and teachers, so we need to make it an enjoyable and relevant lesson. But even before I approach teachers to schedule the library visit, I set the stage with 2 strategies: explaining to teachers how to bring students into the library, and creating a quick video tour of the library for students to see who I am.
 The first day of school I show Introducing Your School Library through our whole-school TV channel. In this 3-minute video, I introduce myself, do a quick walk-around of the library, and give the times that the library opens and closes each day. This brief intro means new students are already aware of who I am so I can fully focus my Library Orientation on content. It’s so successful, that students begin greeting me in the hallways between periods even before their first library visit! I also show the video to parents at PTA Open House and post it on our library Website, which makes it a nice library advocacy tool.
I believe it’s important to establish a procedure for entering the library because it sets the tone for the rest of the visit. At our first staff development before school begins, I explain to teachers that, when they bring their classes to the library, students enter, sit down, and wait quietly for me to begin. I append that this procedure applies to any library visit with any teacher for any purpose. Even if there’s no lesson and I return to my desk, like during testing, I still want students seated to settle them down so I can welcome them into the space.
The reason I do this is because I want teachers to respect that the library is my classroom and I need to direct activities. I’ve learned that teachers appreciate the importance of having this procedure for hormonal middle schoolers!
(If a class comes in a bit unruly, I stop them at the door, have them line up in the hallway and, once quiet, invite them to re-enter the library in the proper way. It only happens once or twice before they get the picture!)
PURPOSE DETERMINES CONTENT
Our English Language Arts classes begin the year studying narrative literature, and ELA teachers want to visit the library within the first two weeks of school so students can check out their first Fiction book. That establishes the purpose of the visit, so I eliminate everything from orientation that doesn’t serve this purpose. My content must be about reading Fiction and giving students plenty of time to find a book they’ll enjoy.
It’s a given that our lowest-grade-level students are new to the school and our building is an alien environment. They have new teachers, new peers, maybe a bus ride, a new schedule, new textbooks, and lockers. The library isn’t important (sorry friends, but it’s true), and it won’t become so if students are overwhelmed at their first visit. It doesn’t matter whether our students are in 1st grade or 6th grade or 9th grade, newbies only need to know 3 things about their “new” library:
- Where the Fiction area is and how it’s arranged
- How to choose a good book
- How to check out their book
We DON’T need to:
|
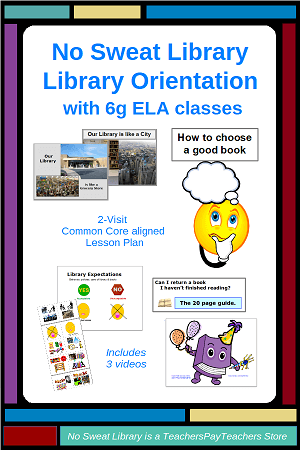
 I begin by having students tour the Fiction area to see how it’s arranged, recall how to identify a Fiction spine label, and put a simulated Fiction “book” on the shelf. They ‘win’ a customized Fiction Subject bookmark that builds anticipation for getting their first book. This activity only takes 6 or 7 minutes…lots of time left for discussing how to choose the perfect book.
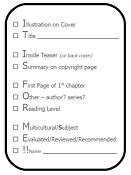 Many of my middle school students don’t actually know how to choose a book. I created IT IS FOR ME!, a mnemonic checklist on ¼ sheet of paper that looks like a phone app, and students watch a 4-minute video to learn how to use it:
I do limit students to one Fiction book for their first checkout and here’s why:
- Newbies need time to practice using the app to narrow their choice.
- For a variety of reasons, the first check-out takes more time, so a single choice allows it to begin sooner and go faster.
- With so much new, these kids just can’t keep track of more than one book right now.
- What I tell students is that everyone in the school will be checking out a Fiction book during the first couple weeks, and by limiting everyone to one Fiction book we maximize the selection for all.
Students have plenty of time to look for a book and fill out the app. I tell them they can pick a book and keep looking around; if they find a better one, leave the first one lying sideways on the shelf for me to re-shelve—an easy procedure, no questions. When they’ve found a book that fills the checklist, they give their app to the teacher for their daily grade, then return to their seat and begin reading to be sure they’ve chosen the “perfect” book.
I’ve mentioned before that my teachers like to give a daily grade for a library visit, and I don’t want the criterion to be behavior. Thus I always have a worksheet or exit ticket so teachers have a relevant document for a grade.
Just as I have a standard procedure for entering the library, I also have a standard checkout procedure. At this first library visit students learn it and we follow it for every visit at every grade level for the entire school year.
- After choosing books, students sit down and begin reading quietly for DEAR time (Drop Everything And Read). I discovered this early free reading allows students to become immersed in the story so they are more likely to continue reading the book to its finish. It’s true even for reluctant readers. (It also gives students a chance to change out their book if they realize it isn’t what they really want.)
- To establish the orderly checkout process, I go to the library seating area and quietly invite 2 tables—usually 6-8 students—to come to the circulation desk for check out.
- Students line up single file, continuing to read as the line moves up; when I’ve checked out their book, they return to their seat.
- When I’m done with a group, I go over and quietly invite another 2 tables for checkout.
(If students in line get chatty, I send them back to their tables and check them out after everyone else; they rarely do it again.)
My ELA teachers really love this checkout procedure, especially free reading, and they began to have DEAR time in their classrooms for half the period on the same day of the week between library visits. I’ve related in other posts how extended free reading improved our State Reading Test scores each year. When other middle schools in our district saw the dramatic increase, our principal shared that one of the factors was library DEAR time every other week. As a result, library visits every 2-3 weeks and free reading time were written into the middle school ELA curriculum.
Once I’ve finished the checkout procedure I allow students to continue reading until about a minute before the class period ends. At that time I ask students for their attention, thank them for visiting, and tell them they’ll be returning in 2 weeks for another short lesson, when they can return their book and check out new ones.
THE SECOND LIBRARY VISIT
Sixth grade students return to the library 2 weeks later, following our procedure for entering the library. Middle schoolers get seated more quickly if I have the learning target displayed on either a screen (if I have a presentation) or an easel (if I don’t) so they know what to expect.
Again the purpose of the visit determines the content of the lesson, and this time students only need to know 2 things:
- how to return books
- library expectations (policies, procedures, behavior)
First we address returning books. Students who have finished their book are asked to place it in the return slot at the circulation desk. I lead students through deciding whether to return an unfinished book using a short animation called The 20-page Guide.
Kids are always surprised about returning unfinished books. Somehow they’ve gotten the idea that they have to finish a book, even if they don’t like it. Absurd. With thousands of books in our fiction area, why shouldn’t a kid be able to sample until they find one they like enough to finish. Frankly, I think it’s the only way we can really learn what will spark our reluctant readers!
After a quick demonstration of where to go for a Fire Drill and a Code Red, students do a Concept Attainment activity at their tables to learn Library Expectations (policies, procedures, behavior). The YES/NO organization of pictorial cards allows discussion and cements the information much better than any explanation I could give. I know it’s successful because weeks later I’ll hear a student remind another one about the “picture” for something they’re doing or a question they have!
Before releasing students to the Fiction area to look for books—1 if they didn’t return their first book and 2 if they did—I present some additional reading choices that may interest them:
- State Middle School Reading List section
- Multicultural choices
- Special Collection to support reading for their 6g Social Studies curriculum.
Students again use the IT IS FOR ME app as their daily grade, returning to their seat for DEAR time and the checkout process. Shortly before the end of the period I display the date of their next library visit and have them write it in their planner as a reminder to bring their books back. This action curbs a lot of overdue books!
DON’T CHANGE WHAT WORKS
This 6th grade school library orientation has been a success, year after year, for more than 10 years. ELA teachers love it because it gets kids reading right away and we don’t waste time on unnecessary minutiae. In fact, they come to me the week before school to be sure they’re scheduled for their orientation and successive visits. I do each 6g class separately for the first visit to have more time for the book checkout process. After that the 2 classes come together, meeting directly in the library instead of the classroom to avoid disruption and to have more time.
A benefit of this lesson is I don’t need a lot of differentiation for Special Education students, for Reading Recovery students, or for Level 1 ELL students. I simply bring the classes in separately so I can work with them on the activities. I do feature additional reading choices that are adapted to their needs—especially picture books, QuikReads (lower-level, easy reader chapter books), and graphic novels.
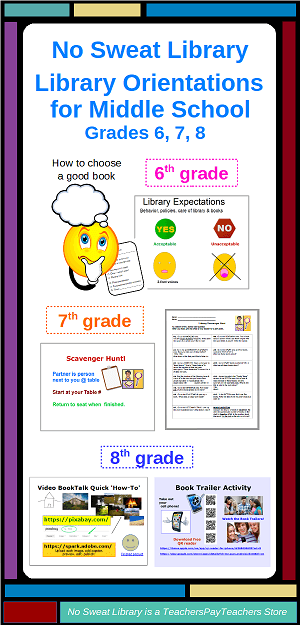
As fun as this newbie orientation is, I don’t use it for returning students who already have some experience with the library. I have unique library orientations for my higher grade level students, and my next blog post is how I customize lessons for them.
| You can get my 6g Library Orientation through my NoSweat TPT store, or get the 678 Orientation bundle! |
|
 |
 |
![]()