Modeling is the second step in the AASL-recommended lesson sequence, so it’s importance is evident. But I wonder if most educators realize how we present lessons is as important as the content, especially when using technology.
Students do as we do (model), not as we say. We can’t expect them to build digital literacy and technology competence unless we properly model it. Here are some practices I use when sharing tech with students, along with a lesson that integrates technology in order to enhance a student product and increase student engagement.
PROPERLY MODELING SLIDE PRESENTATIONS
I believe it’s crucial for educators to model technology correctly when delivering a lesson. If we read text off a slide during presentations, we aren’t modeling or presenting the material properly. In fact, we’re actually interfering with the students’ reading of the text instead of creating an image of a concept in their mind.
 I learned the best way to do slide presentations from Lee Hilyer, University of Houston librarian, in a webinar** sponsored by the Texas Library Association. His 3 simple rules are:
- Say the words – create a script of what you want to say
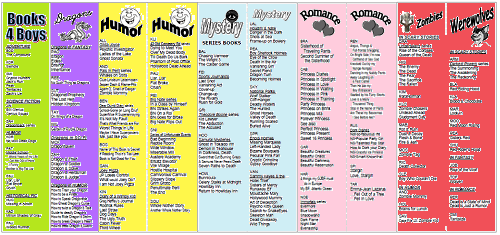
- Show the pictures – use relevant images that fill the slide
- Text is for take-away – minimize slide text and expand on the topic with a handout
So how does one put that into action? Here’s what I do:
- I create a script for each slide using the “Notes” feature of the slide application, then later I print them out as prompts to use during the presentation.
- I limit text on slides and use visual representations that cement concepts into students’ minds. I also try to keep a presentation under a dozen slides because students won’t pay attention nor remember more than that.
- My take-away is the student activity sheet, which is also their daily grade for the library visit.
Hilyer also recommends standing to the left of the screen so students use their natural left-to-right reading pattern to see us first, then the slide. To facilitate that, I use a remote control to advance slides; it also allows me to move around, as needed. (Having two remotes allows students to use one during their own presentations.)
I know many educators think that providing text on a slide allows students to take notes during the presentation, but brain research shows that is not the best way for students to learn. Learning happens much better when we pair our speaking with highly engaging visuals and provide students a guided notetaking sheet or graphic organizer on which to record their understanding. Give students a short time after the presentation to compare notes so they all have the pertinent information.
Download a PDF of my notes summary for Lee Hilyer’s webinar
As we present improved lessons, students will intuit the most engaging way to create their own slide presentations. Students see so many slideshows in their other classes, that it’s easy to ‘tune out’ in the larger library classroom, so I limit how many slideshows I use for my Library Lessons. Students do occasionally enjoy a short, auto-timed & narrated slide show—perhaps it’s more like a video—so I sometimes do that for variety. But if I can find a better way to instruct than slideshows, I do so.
PROPERLY MODELING ONLINE TECH TOOLS
I believe it’s crucial for school librarians to uphold the rules we expect students to follow regarding the use of online services. It’s important that digital & technology lessons for under-age-13 students use in-house applications, or if we use onlne services, we use those provided by the state or district for students. Only use public or commercial services that do not need to have students create accounts, which for under-age students is illegal.
Keep in mind that some technology projects require the use of multiple apps to accomplish them, like creating screencasts with one tool or videos with a different tool, and needing a YouTube account to which we can upload them. We may need to create a school account for our under-13 students, and share the login & password with them so they aren’t obliged to create illegal accounts. Careful evaluation of tools and the grade levels with which to use them with is how we model good digital citizenship for students and for our teachers.
INTRODUCING A NEW TECH TOOL
School Librarians are often the most tech-savvy person in the building, so we frequently are the person initiating use of a new tech tool. To decide with whom I’ll present a new tool, I ask myself 2 questions:
- “What subject or curriculum standard will this tool best support?”
- “Who is my most accommodating teacher of this Subject?”
Once I’ve answered these questions, I use my Library Lesson Planner to create a lesson and show it to the teacher during their planning period. They are often, coincidentally, looking for something to “refresh” the lesson, unit, or activity, and greet my well-prepared tech lesson suggestion with enthusiasm. I offer to show them how to use the tool before the visit and they’re usually eager to try it out, so they can help students during the lesson and when they aren’t in the library.
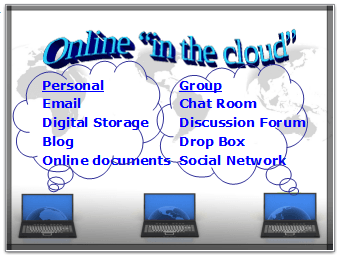
During the lesson I’ll use animated slides to introduce the digital literacy concept, the type and purpose of the technology tool, and its form of audience interaction. The best way to teach technology is to demonstrate how to use it, so I close the slides and open the online service.
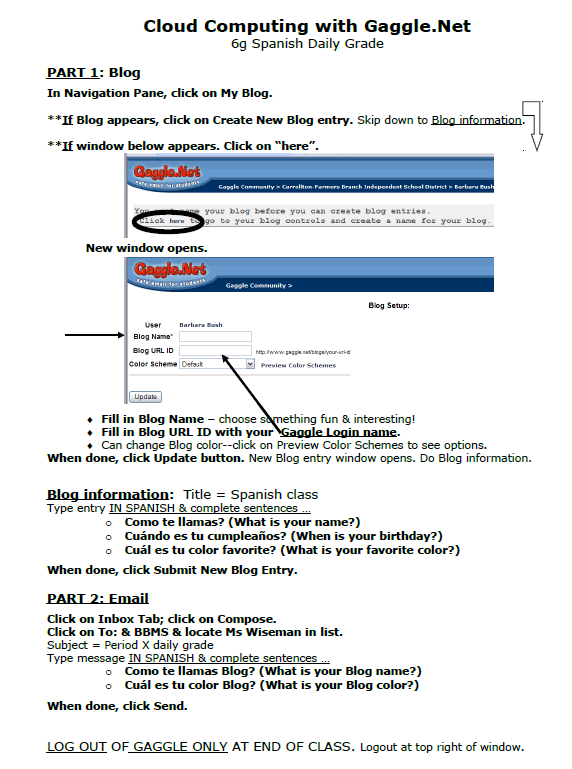
I have students take a handout from a stack on the table which has tool images to help students follow the demonstration. Students use the rest of the period for a daily grade activity that guides them into features the teacher wants them to use for the assignment.
Once students are introduced to a service, they often ask other teachers to give them assignments using it. The teachers come to me for help, and I’m able to expand student use of the service through short integration lessons during library visits with those other Subjects.
To keep Digital Literacy concepts fresh in students’ minds, I print out and laminate chosen slides from lessons as educational signage and display them near library computers. I use clear, acrylic, letter-sized sign holders, wall-mounted and free-standing, so I can change signs to highlight particular elements I’m presenting. The signs are reminders which activate and reinforce terminology, concepts and processes, and legal and ethical responsibilities. Teachers like them, too, and they had me mount some on the walls in their computer labs.
A TECHNOLOGY-ENHANCED PROJECT
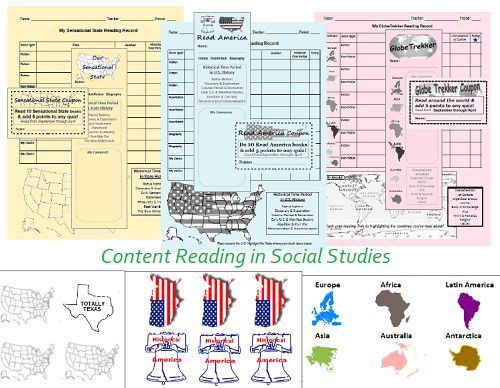
 Sometimes a project can be done without technology, but technology makes the project more authentic and meaningful. Such is the case with the Dream Vacation Project. This is a true multidisciplinary project with ELA, Math, and Social Studies that is an authentic and meaningful use of online resources and apps.
-
- The initial library visit is with Social Studies classes to Investigate a country. I present a problem-solving model and our online subscription services, and students browse maps and information on geography, climate, main cities, and natural wonders so they can decide which country they want to choose for their “dream vacation.”
linebreak - A few days later Math classes visit to Plan the Dream Vacation and I introduce an online Resource Link List for the project. There are links to travel service providers where I show them how to find the cost of air flights, hotels, and ground transportation.
linebreak
There are also links to tourist & travel bureaus which give popular tourist destinations and prices for tours. Students have a certain dollar amount they can spend on their trip, so my Resource List provides currency conversion websites so they can calculate and keep track of trip costs.
linebreak - The following week English Language Arts classes visit the library for the Create phase of the problem-solving model. I remind students about Academic Honesty and citing text and images, then show them how to Create a Webpage to present their project in one of two ways:
- as a travel agent promoting a Dream Vacation for clients, or
- as a tourist who is sharing experiences from their Dream Vacation.
Teachers distribute a checklist of product requirements and an assessment rubric, which I also have on the project’s online Resource List.
- At the end of the project I load Student Webpages to our school website. During ELA classes students use computer spines or the library to view their class’s site and, with a rubric, they Evaluate the Dream Vacations.
- The initial library visit is with Social Studies classes to Investigate a country. I present a problem-solving model and our online subscription services, and students browse maps and information on geography, climate, main cities, and natural wonders so they can decide which country they want to choose for their “dream vacation.”
Using multiple technology tools makes this project more authentic, more exciting, and more successful for students, especially since they receive credit in three different subjects for one product. I incorporate several Information Literacy components into the project, and I can adapt it to other grade-level Social Studies classes by having the vacationer visit destinations in our state or across the U.S.
**Acknowledgments to Lee Hilyer of University of Houston for permission to use information from his TLA Webinar.
![]()